The restoration of When Old Mauch Chunk Was Young begins as a cautionary tale. Many well-meaning folks have unintentionally damaged their oil paintings in an effort to clean or repair them. Professionally-trained conservators recount horror stories of paintings cleaned with dish soap or rubbing alcohol, or coated with linseed oil as a conditioner (like hand lotion). They’ve seen holes in the canvas that were spackled or patched like bicycle tires. Sometimes paintings have been “freshened up” by artists overpainting areas dulled by grime to brighten them up. These “home remedies” invariably cause more problems than they solve, and often do irreversible damage.
PLEASE DO NOT TRY TO CLEAN OR REPAIR YOUR OWN OIL OR ACRYLIC PAINTING!
The preservation, conservation, and/or restoration of works of art is a complicated practice and should be handled by a trained professional who has studied chemistry and art history and has a graduate degree in art conservation. The practices and materials applied to the treatment of When Old Mauch Chunk Was Young were tested and customized for this specific work of art. Please do not try to replicate the process at home.
Phase 1: Examination and Testing
The restoration team at the conservation studio of Winterthur Museum examined and tested various gels and petroleum-based solvents to determine the best treatment process.
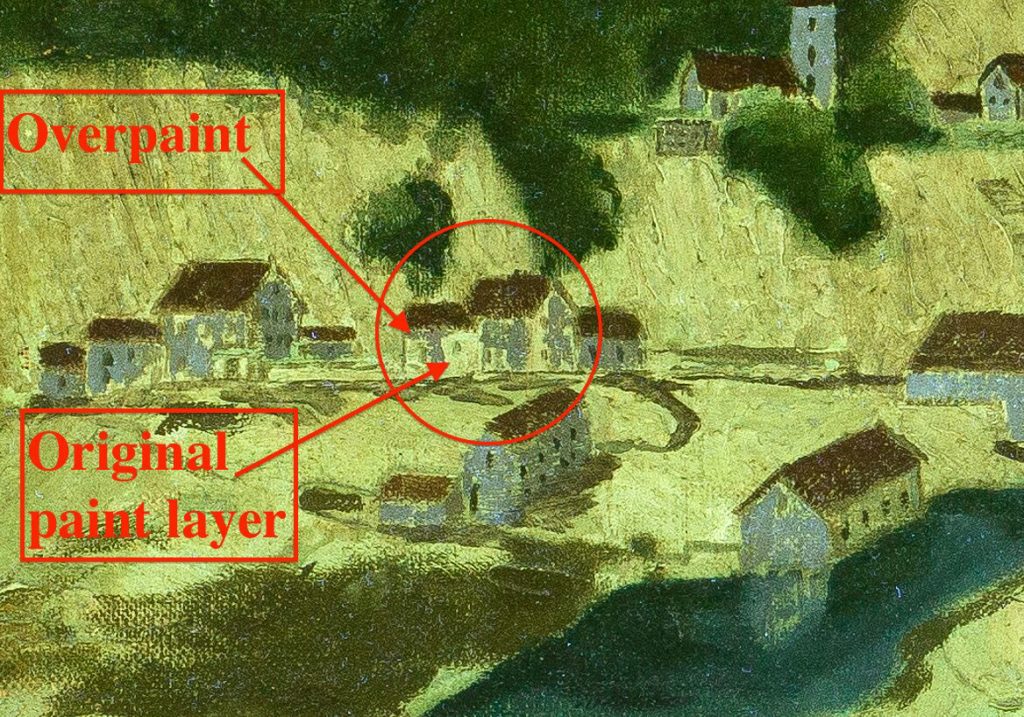
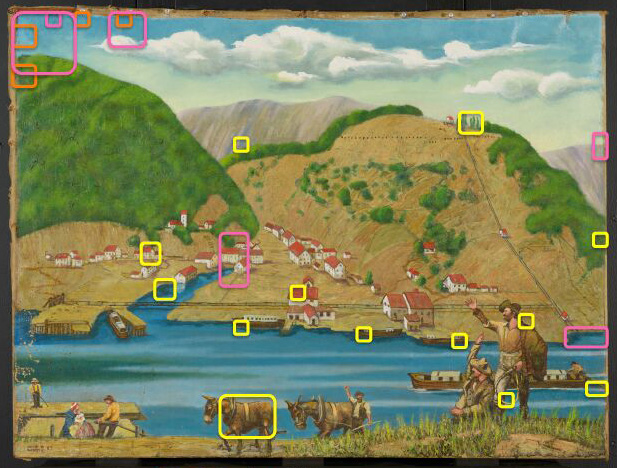
Since overpainting was a confirmed issue, Old Mauch Chunk was first viewed under ultraviolet light to determine the extent and locations of the overpainting. Ultraviolet photography revealed overpainting throughout the painting, most notably in the green trees and red house roofs. In the UV detail photo (below right), the gray color indicates overpainting, while the brighter yellow is the original paint layer.
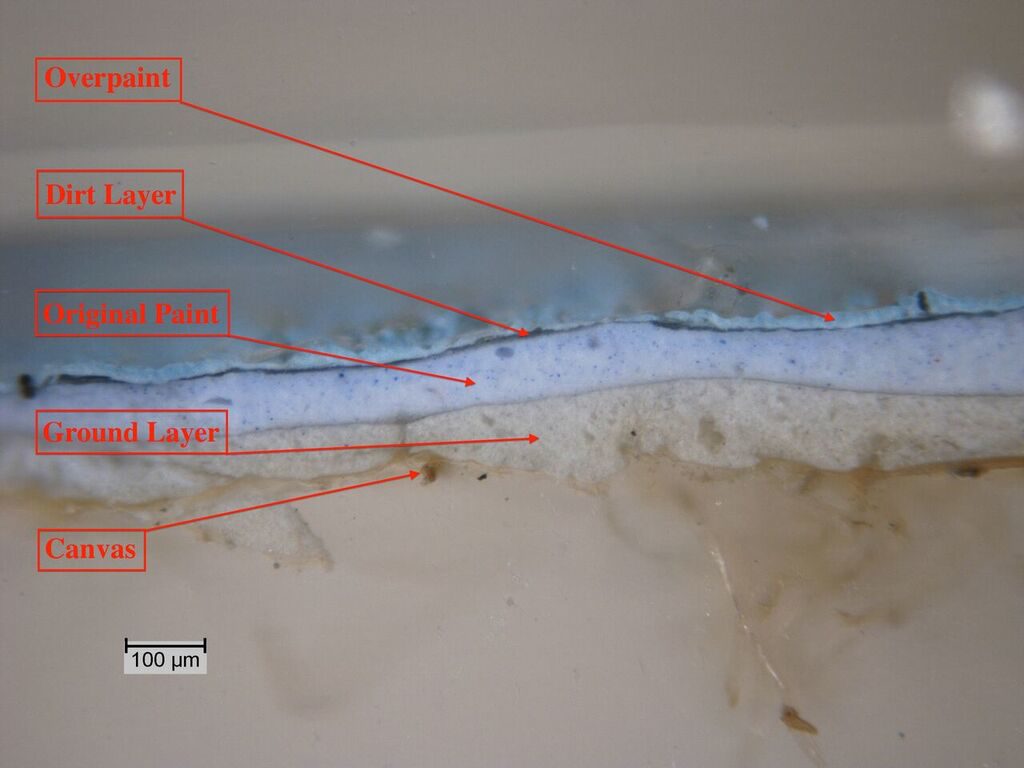
Next, intern Melissa King (left), took pinhead-sized paint samples and sealed them in resin cubes in the red container. When the resin hardened, a cube was placed into a special sander. The polyester resin material was sanded away to reveal a cross-section of the paint sample which was examined under a microscope. The photograph (far left) shows the various layers of overpaint, dirt, original paint, ground, and canvas at 10x magnification. These cross-sections confirmed the presence of overpaint on the majority of White’s painting; a previous owner had asked an artist friend to “freshen up” the painting and, unfortunately, the friend completely repainted the surface of White’s original painting using acrylic paint. The resulting overpainted work is jarringly bright, ignoring White’s typical color choices.
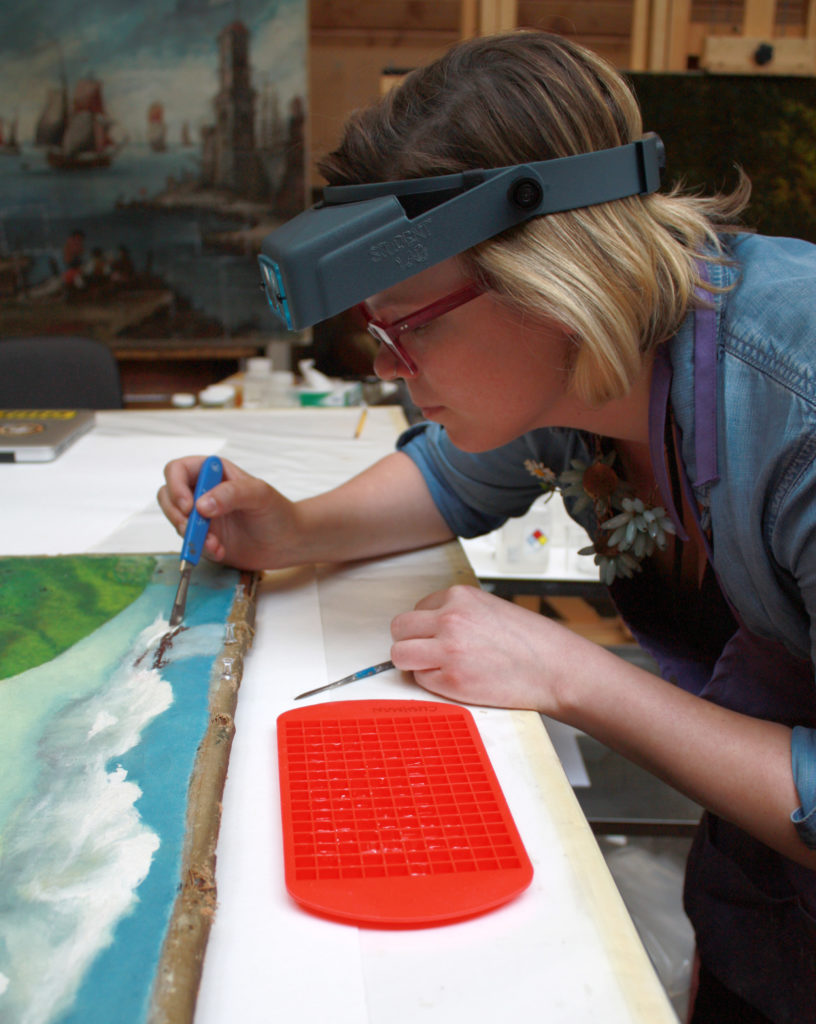
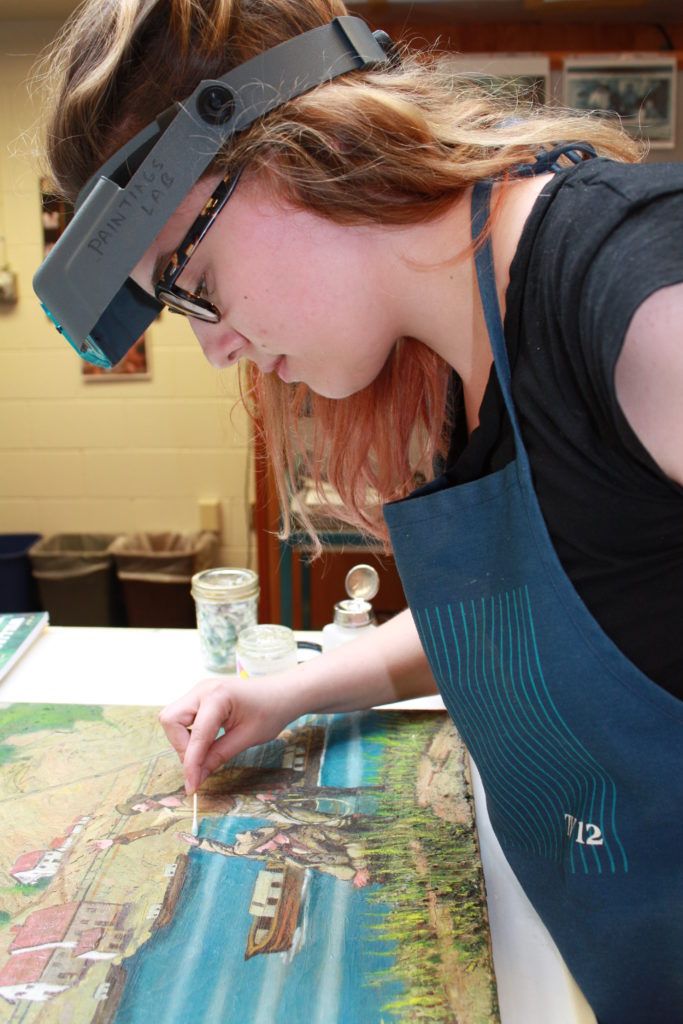
In order to remove the acrylic overpaint without affecting White’s original painting, project leader, Charlotte Adams Brooks, tested select areas of Old Mauch Chunk with various solvents. For example, a petroleum benzine mixture and several different types of carbopol gels rendered the best results in the areas marked in yellow. In this photo Charlotte uses a cotton swab to test a small area of the painting.
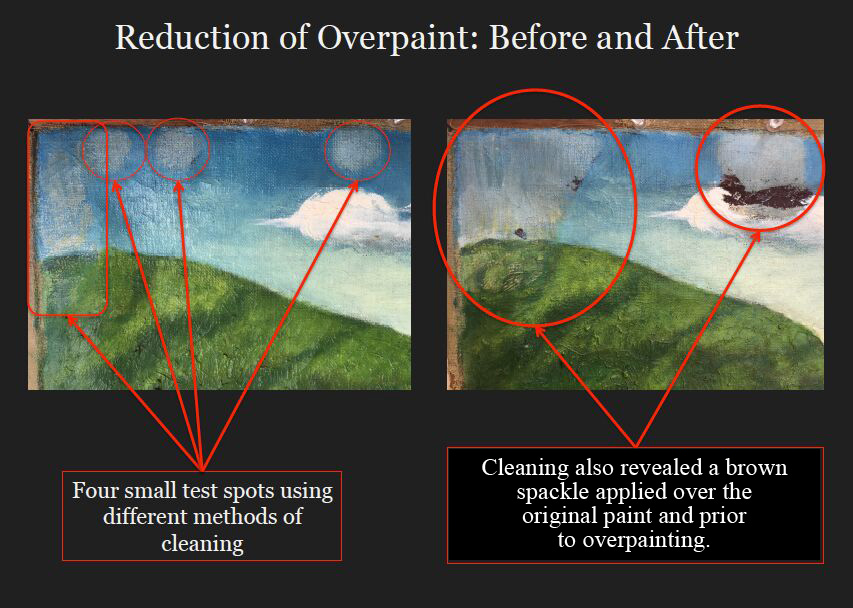
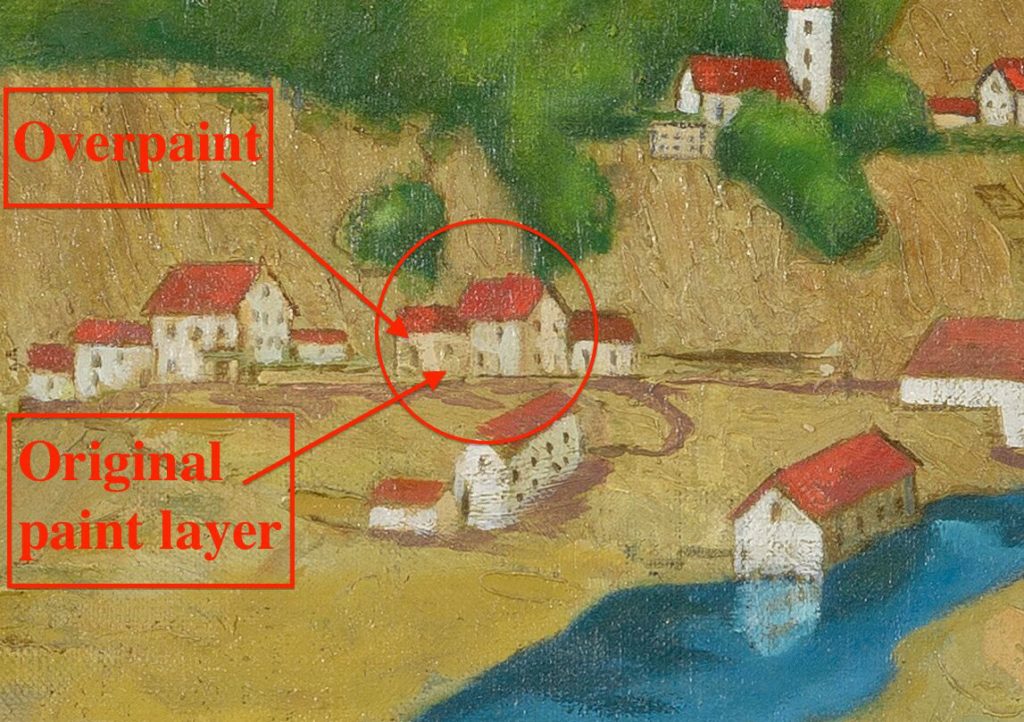
 To reduce the overpaint, the interns, under the direction of Dr. Joyce Hill Stoner, have tested different kinds of mineral spirits and gels with added solvents of varying degrees of strength. After testing, a safe and effective solvent gel can be selected. Lead intern on the project, Charlotte Adams Brooks, has begun to carefully reduce the overpaint in selected areas. The “After” photo above reveals William D. White’s sophisticated color palette and details obscured by overpainting. Note how the reflection of the house in the water and subtle color variations in the building and foliage are now visible.
An important step in PHASE 1 includes taking steps to ensure that the painting can be safely handled. The actively flaking bits of paint have been consolidated with a reversible adhesive to ensure their stability while the back of the canvas is being treated. The next stage will be to remove or reduce the black paint and plastic tape on the back of the canvas as much as is safely possible. The distortions in the canvas will be leveled without putting stress on the paint, and then the rest of the overpaint can be reduced.